Whenever you purchase new inventory to sell in your store, you should "receive" it into the Open Source Point of Sale system.
You do this through the Receivings page. Click on the Receivings tab in the header.

This will load the Receivings page.

You can use this screen to "Receive" inventory into the system or "Return" it to one of your suppliers.
By default, the Receiving Mode is set to Receive. Leave it that way for now.
Start by typing the item's name into the "Find/Scan Item" field.
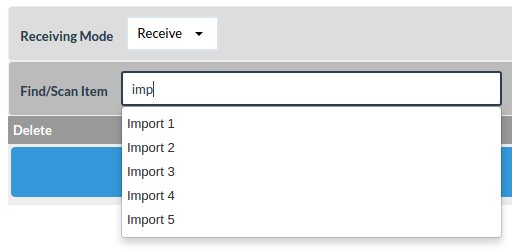
Click on your item and it will be added to your item list. You can add multiple items to the list if you wish.
When you're done, it will look something like this:
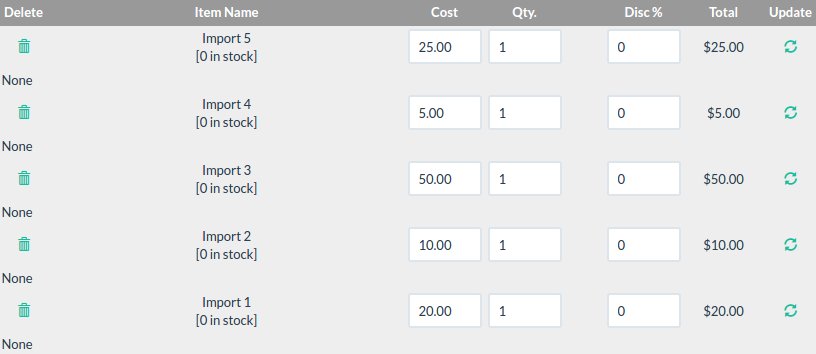
You can edit the cost, quantity, and discount percent if you wish. If the inventory item isn't in the system yet, you can click the "New Item" button to launch the "New Item" form. (See the New Items guide.) In this case, we've imported the items, so we don't have to create them.
If you have a supplier, you can type the supplier's name into the Select Supplier section. If you don't, you can either skip this or click the New Supplier button to add one. (See the Suppliers guide for more information.)
Finally, you select a Payment Type and enter the Amount Tendered.
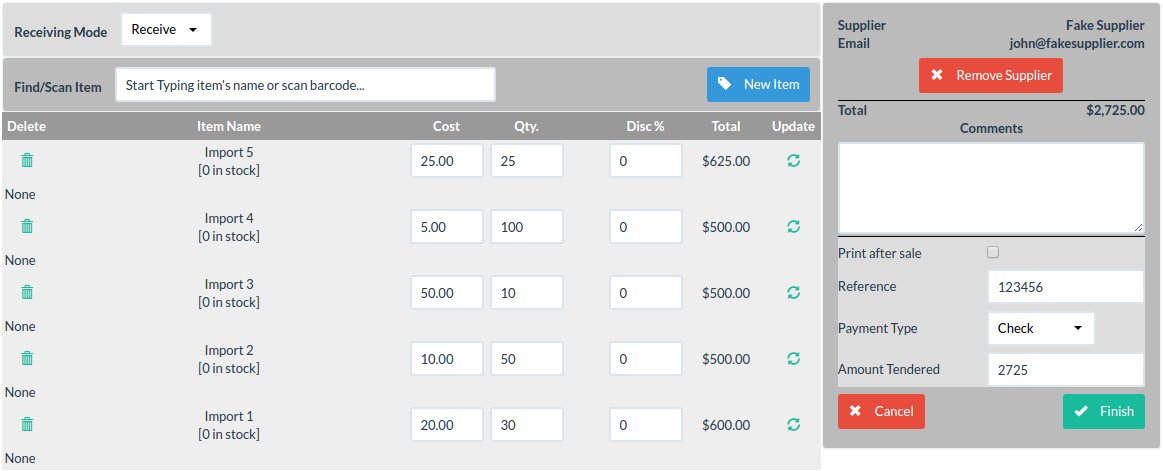
When you're satisfied, click the Finish button.
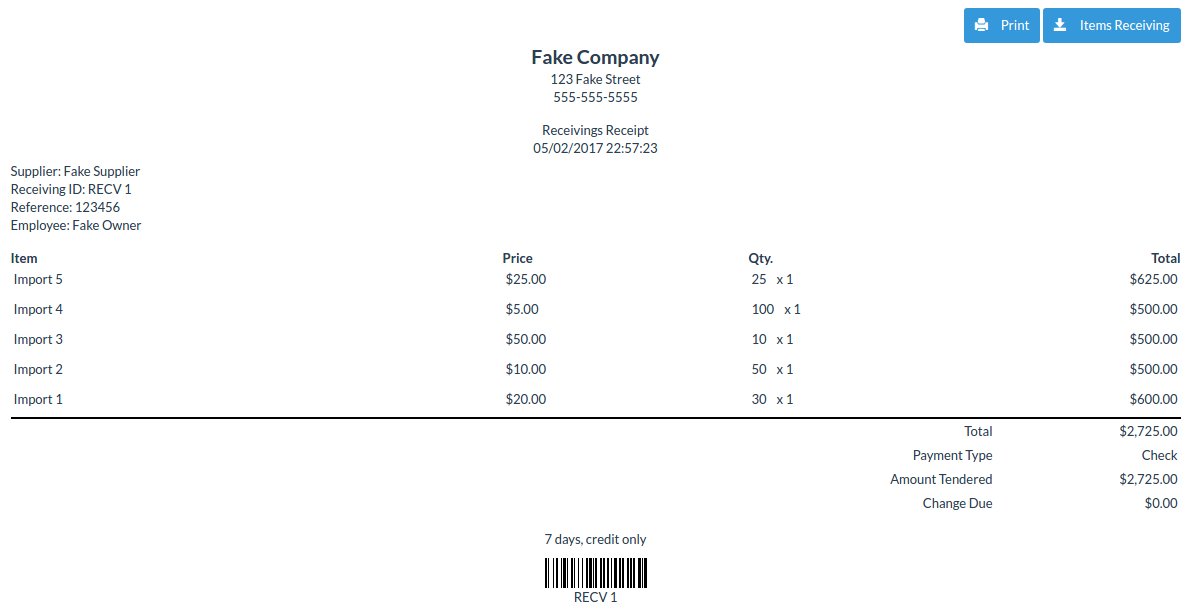
OSPOS will generate a Receivings Receipt. We recommend printing out this report and stapling it to your invoice. You can then track the cheques you cut with an accounting program.
The Receivings Report looks like this:
If you have to return an item to a supplier, click the Receivings tab again, and this time change the Receiving Mode to Return.
Then type the item's name or the scan the barcode into the "Find/Scan Item OR Receipt" field. You can also type the receiving number (in this case "RECV 1") into the field and press Enter. This will load all of the items on that Receiving with negative quantities.
It will also add the supplier automatically if there was one and show the total as a negative number.
You can edit the quantities if you need to. Then you just have to select the "Payment Type" and the "Amount Tendered". In this case, they're paying you by cheque, so you select a "Payment Type" of "Check" and the "Amount Tendered" as -2725.
Click the Finish button when you're satisfied. This will generate a new Receiving Report. Staple this to your original invoice and receipt. You want to keep as much of this paperwork together as you can.
Note that you don't have to print off these receipts if you don't want to. You can always look up the receipt on the Reports page, using the Detailed Receivings Report.